Import from a volume
Overview
Once you connect your cloud storage with CAVATICA, you are able to import files from that volume to your projects.
Prerequisite
To import files from a volume to CAVATICA, you need to have a connected Amazon Web Services (AWS) or Google Cloud Storage (GCS) volume. Learn more about connecting your cloud storage volume.
- Allowed characters in file names are all alphanumerics and special characters except slash (
/). File names can’t be longer than 255 characters.* Allowed characters in folder names area-z,A-Z,0-9, and special characters (_), (-), and (.). Folder names can’t be longer than 255 characters.
PROCEDURE
-
From the main menu bar select Data > Volumes. The list of attached volumes opens.
-
Click the name of the volume that contains the files and/or folders you want to import.
-
Select the files you want to import.
-
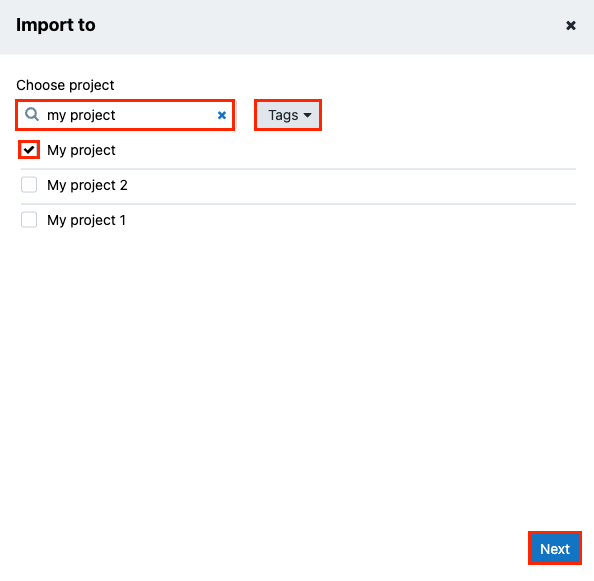
In the top-left corner above the files list, click Import to Project to and select the project where you want to store the imported items.
-
(Optional) Enter the name of the project into the search field if you want to find a specific project.
-
(Optional) Click Tags to look for a project based on the specified tags.
-
Click Next.
-
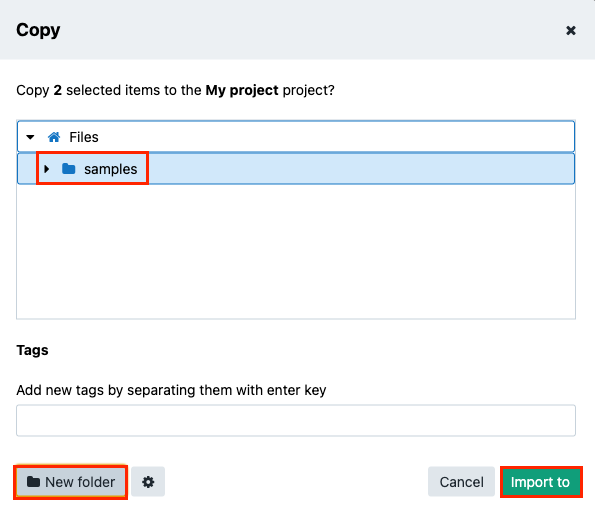
(Optional) You can import items into a specific subfolder by choosing it in the folder tree. You can also create a new folder by clicking New folder in the bottom-left corner.
-
(Optional) In the Tags field add the keywords (tags) that describe the imported items.
-
(Optional) Click <img src="https://files.readme.io/d5f2092-cog.png"
height="12px" width="auto" align="inline" style={"margin":"1px"} /> to set additional options:- Resolve naming conflicts - Select the action to be taken if a naming conflict occurs. Available actions are Skip (default option), Auto-rename and Overwrite. Read more about naming conflicts resolution below.
- Preserve folder structure - If enabled, the imported items will be an exact mirror of the file/folder structure on the volume. Otherwise, the items will be "flattened" when imported from the volume, i.e. only files will be imported, with no folder structure.
-
Click OK. The import procedure starts.
RESOLVING NAMING CONFLICTS
Naming conflicts happen when you try to import an item (file or folder) from a Volume to a project's root folder or subfolder, where an item with the same name already exists. The list below illustrates the possible cases of naming conflicts and the way they are resolved depending on which option is selected in the Resolve naming conflicts dropdown:
- Importing a file that has the same name as an existing file at the destination path:
- Skip (default): The file won't be imported. This is the default behavior.
- Auto-rename: The imported file will be automatically renamed by adding a prefix (underscore and serial number).
- Overwrite: The existing file will be overwritten by the file imported from the volume.
- Importing a file that has the same name as an existing folder at the destination path:
- Skip (default): The file won't be imported.
- Auto-rename: The imported file will be automatically renamed by adding a prefix (underscore and serial number).
- Overwrite: The file won't be imported.
- Importing a folder that has the same name as an existing folder at the destination path:
- The content of the folder that is being imported will be merged with the content of the existing folder, regardless of the option selected in the Resolve naming conflicts dropdown. Any conflicts related to files within the folders will be handled according to file naming conflict resolution rules described above.
- Importing a folder that has the same name as an existing file at the destination path:
- The folder and the files it contains won't be imported. This is the default, non-configurable behavior, regardless of the option selected in the Resolve naming conflicts dropdown.
The following table illustrates the entire naming conflict resolution mechanism:

Resources
Updated 8 months ago