Import data from CDS
About the CDS
The Cancer Data Service (CDS) is a data repository under the NCI's Cancer Research Data Commons (CRDC) infrastructure for storing cancer research data generated by NCI funded programs. Its data is stored in the Database for Genotypes and Phenotypes (dbGaP) database provided by National Center for Biotechnology Information (NCBI). CDS hosts datasets that contain controlled access data, with access permissions being controlled by dbGaP
The process of importing files from the CDS to CAVATICA consists of the following two stages:
- Downloading a manifest file from the CDS website.
- Importing files to CAVATICA based on the downloaded manifest file.
Download a manifest file from the CDS
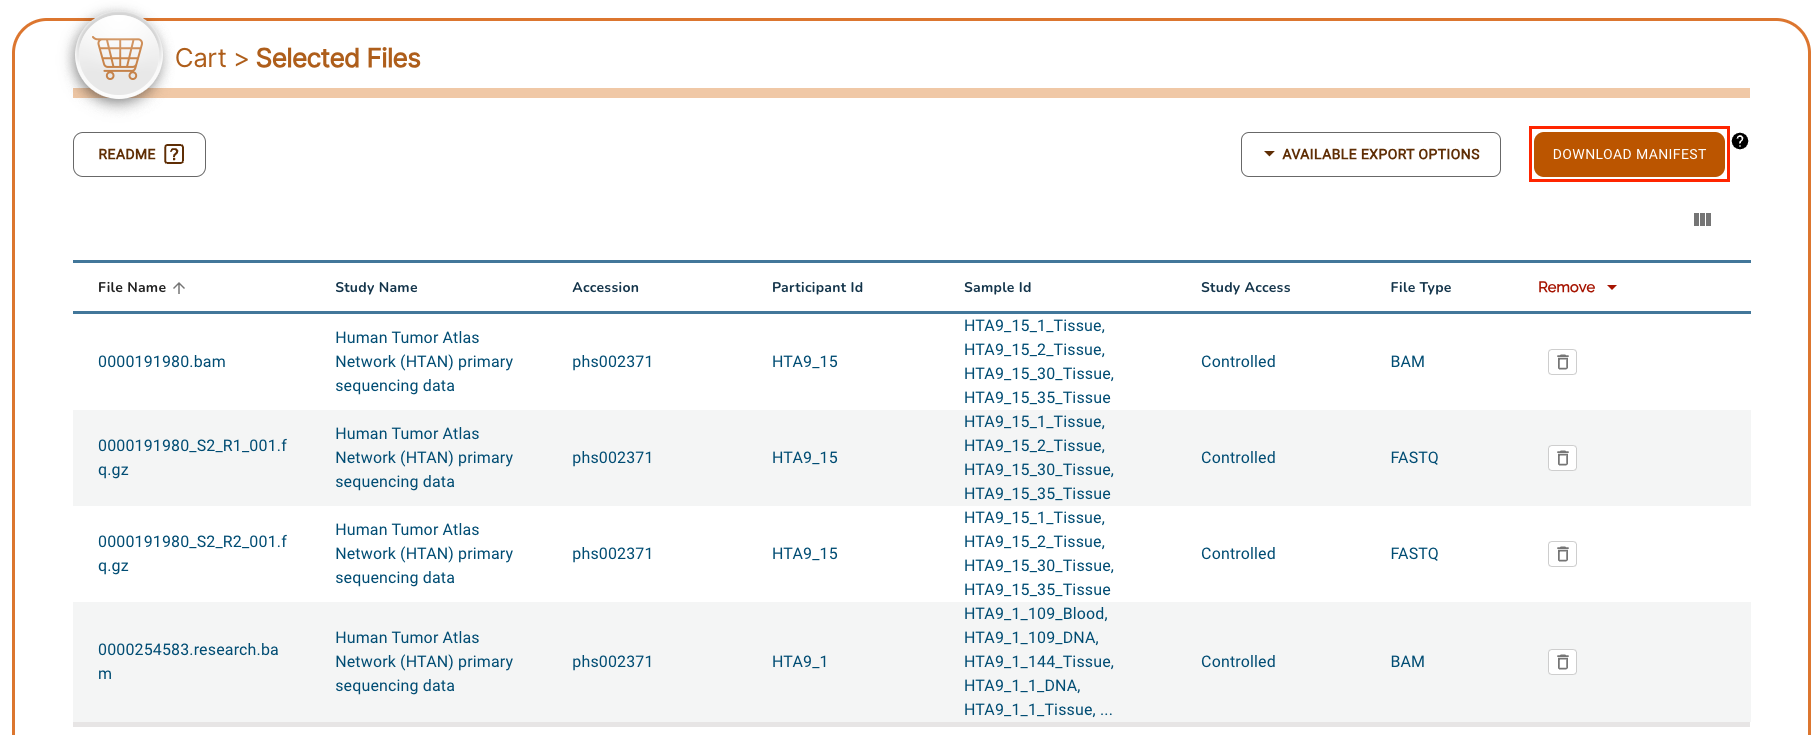
Manifest files that are downloaded from the CDS contain information about the data you want to import in the second stage of this process.
To download a manifest file from the CDS:
-
Open the CDS website.
-
Click EXPLORE CDS PORTAL.
-
(Optional) In the Filters pane, use the available filtering options to narrow down the search results.

-
Select the Files tab below the chart. A list of all files is displayed below.

-
Select the files you want to import to CAVATICA and click Add Selected Files.
-
Next, click the shopping cart icon in the upper right corner. The information about the number of selected files is also shown.
-
Click Download manifest and save the manifest to your computer.
The rest of the steps are done on CAVATICA.
Import files to CAVATICA
-
Access the project you want to import the files to.
-
Click the Files tab.
-
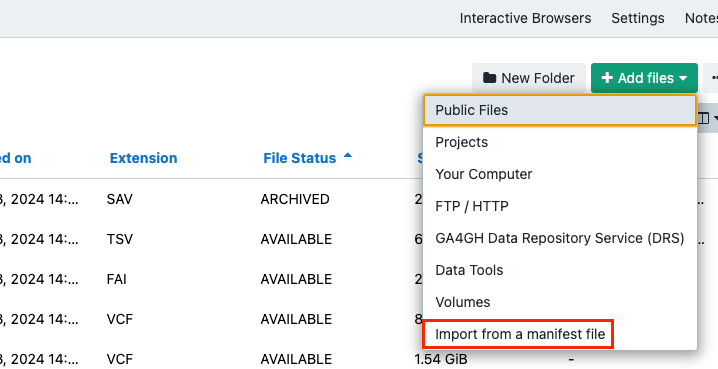
Click Add files and choose "Import from a manifest file".
-
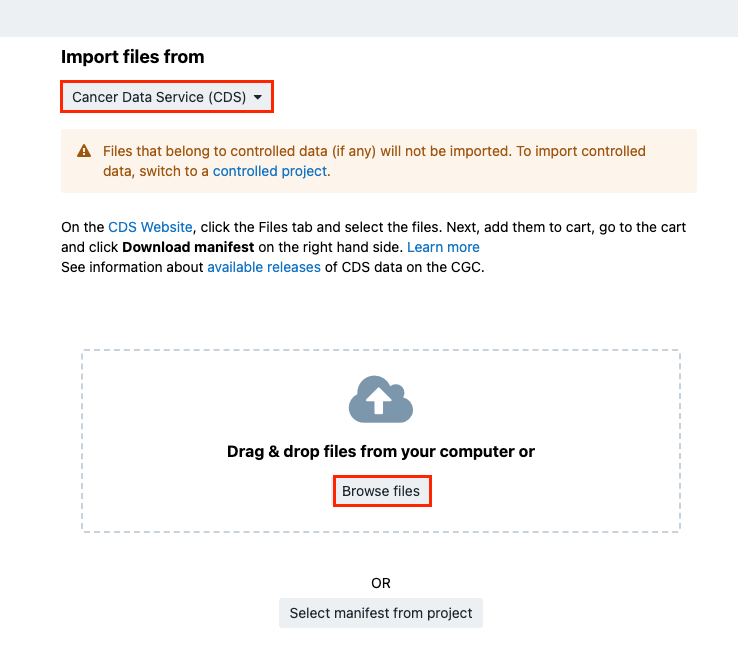
Next, choose Cancer Data Service (CDS)from the menu.
-
Click Browse files and locate the manifest file you have previously downloaded from the CDS Portal.
-
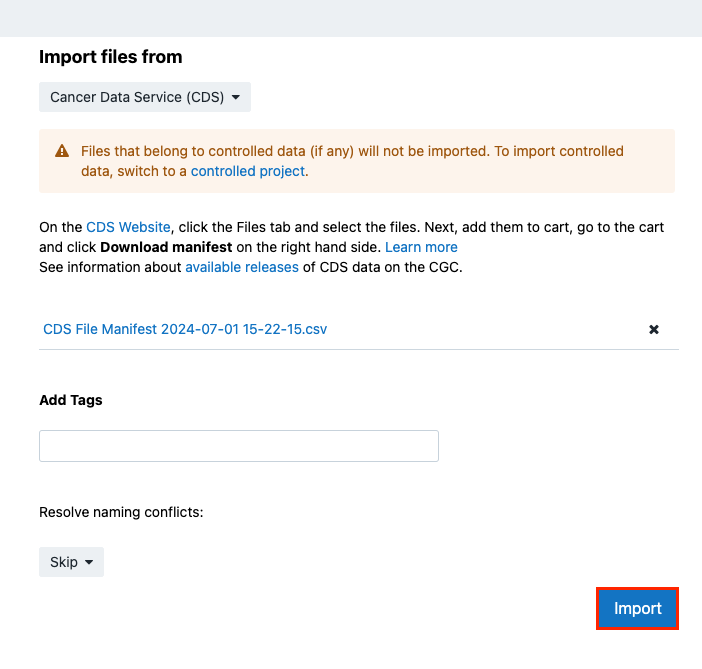
(Optional) In the Add tags field, add the keywords (tags) that describe the imported items.
-
Resolve naming conflicts - Select the action to be taken if a naming conflict occurs. Available actions are Skip and Auto Rename. Read more about naming conflicts resolution.
-
Click Import.
The files are now imported to your project.