Import data from Gen3 AnVIL to CAVATICA Cloud
Overview
The purpose of this feature is to allow you to bring data to CAVATICA after creating a cohort on Gen3 Anvil, which includes DRS URIs and a subset of metadata from the PFB file. The PFB file that was used as a manifest is also imported into your project as it contains all available data.
The procedure consists of:
- Selecting and exporting data to CAVATICA powered by Gen3 from Gen3 Anvil;
- Connecting Gen3 AnVIL account to your account on the Platform. This step occurs the first time you land on the Platform after exporting data from Gen3 AnVIL;
- Importing data into a controlled project on CAVATICA powered by Seven Bridges;
- Converting Avro files to JSON if you wish to use raw clinical data in your analyses..
Selecting and exporting data from Anvil powered by GEN3
This step takes place on Anvil powered by GEN3.
Before you can import the data into your project on CAVATICA, you first need to export it from AnVIL powered by Gen3. Follow the procedure below on the AnVIL platform:
- On the top navigation bar click Exploration.
- In the pane on the left, select the Data tab.
- Use the available filters in the Filters section to select patient data of your interest.
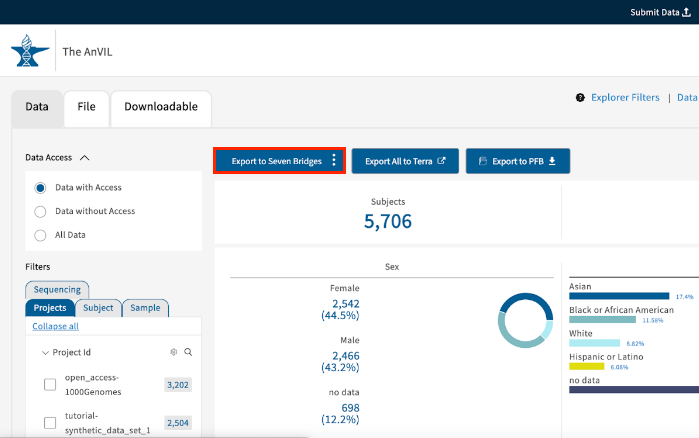
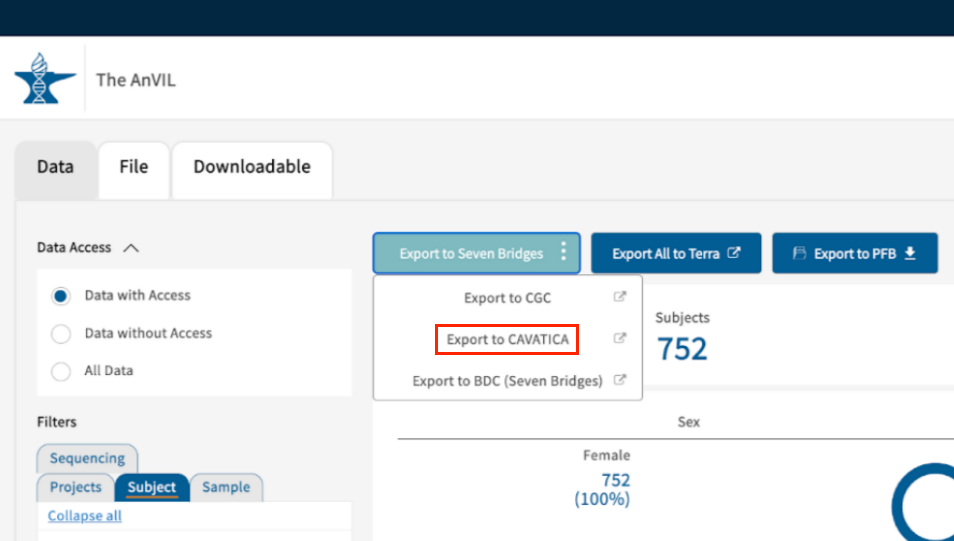
- When you're done with filtering, click the blue Exxport to Seven Bridges and choose option Export to CAVATICA to start the export process.
- A pop-up bar will appear on the bottom of the page, instructing you not to navigate away from this page until operations are complete. When the files are finished preparing for export, a new window to CAVATICA will open.
Connecting your GEN3 AnVIL account to CAVATICA
This step takes place on CAVATICA powered by Seven Bridges.
After you have created your CAVATICA account, you will need to manually connect it to your GEN3 AnVIL account. In order to do this, your CAVATICA account will need to be ERA Commons connected when you create it, or Upgraded.
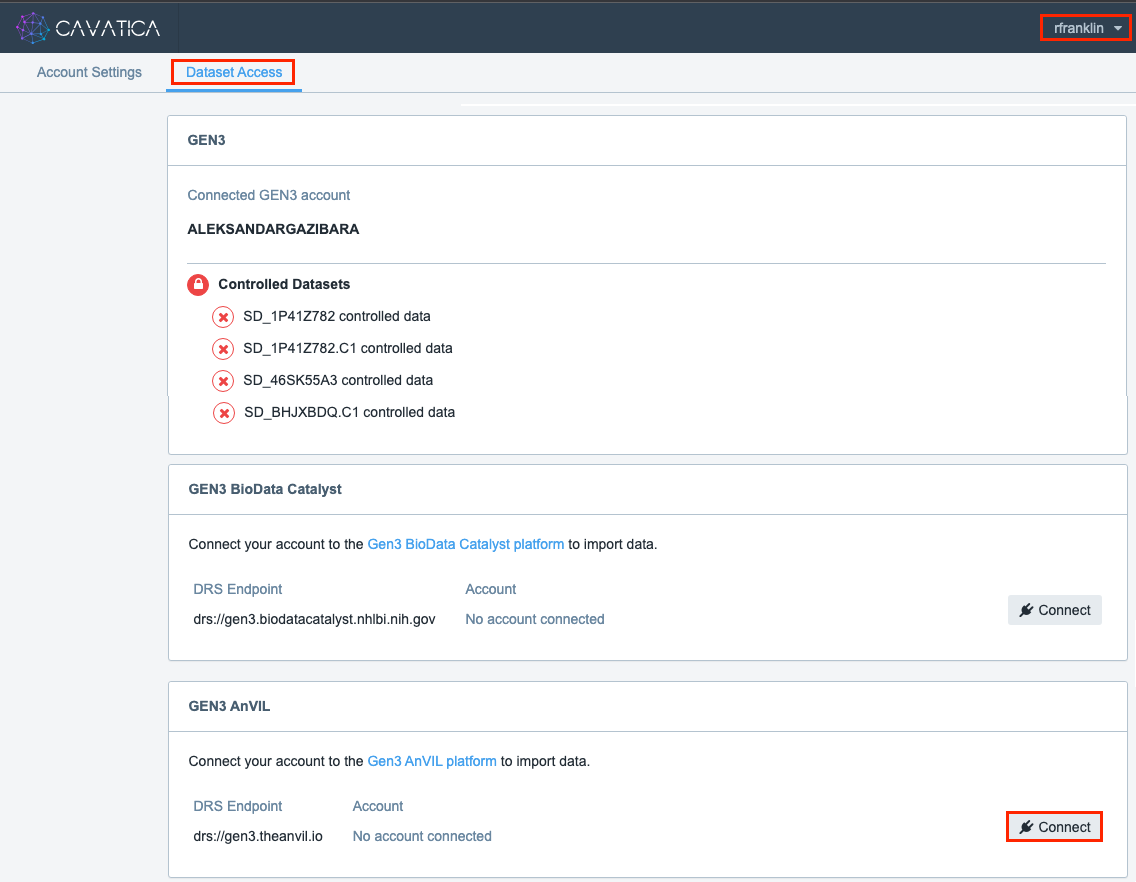
- With your ERA Commons connected account on CAVATICA, go into Account Settings under your username menu in the upper right, and navigate to the Dataset Access tab. (Note: if you created your account before your ERA Commons ID was available, you will have the Upgrade Account option to connect CAVATICA to ERA present in this tab).
- Scroll down until you see the "GEN3 AnVIL" section. Your first time, you will connect your account and go through ERA and GEN3 authorization prompts. This will connect your account for 30 days; you will need to hit the Reconnect button to reestablish connection with GEN3 AnVIL after that date or 30 days on from another connection.
If you experience trouble transferring data between CAVATICA and GEN3 AnVIL, connecting/reconnecting ERA Commons is a common solution. Make sure you are still connected through CAVATICA before beginning other troubleshooting steps.
Importing data into a project on CAVATICA powered by Seven Bridges
This step takes place on CAVATICA powered by Seven Bridges.
After using the export feature, you will land on a page for setting up the import to CAVATICA.
- Option A:Select the project to which you will import the data (Important note: this data can only be imported to a controlled project).
Option B: Create a new project and upload the files there.
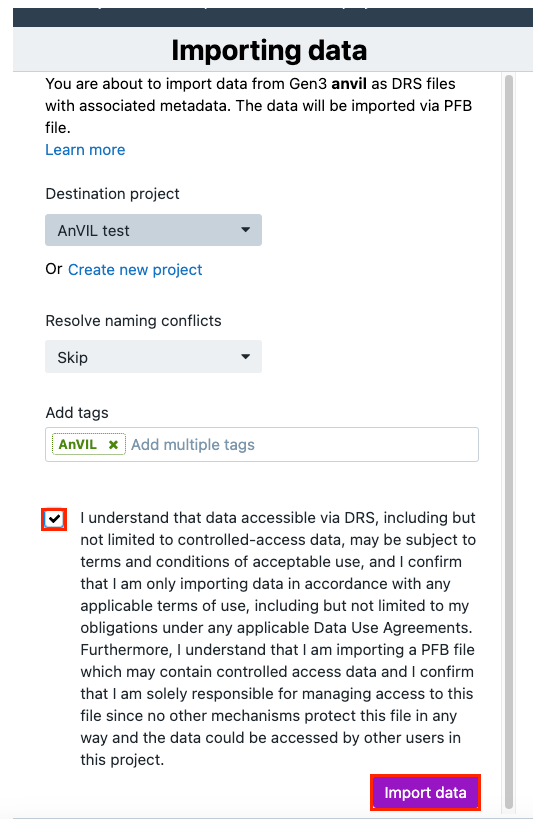
- (Optional) Add tags for the files. This is very helpful for using the full functionality of the file management system on the Platform.
- (Optional) Choose the method for resolving naming conflicts in case files with the same names already exist in your project.
- Click Import Data. A new page with instructions will load.
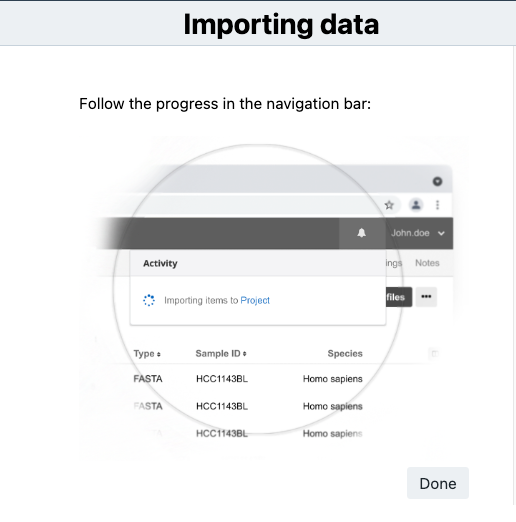
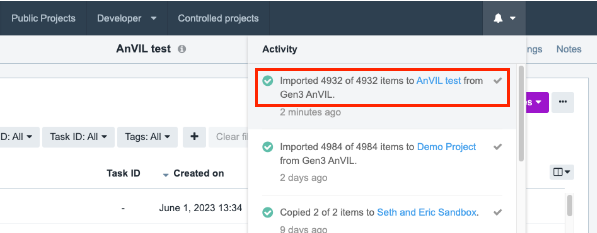
The files will be imported along with any tags you may have included. The notification bell in the upper right corner contains information on the exact number of files that were uploaded.
You will be able to monitor the progress and will be notified when it is finished. This action may take up to 5-10 minutes to complete depending on the size and number of files.
To use data found from PFB (avro) in your analyses, the data will first need to be extracted from archives and then converted to JSON, following the procedure below.
Along with the files you have selected, a PFB (avro) file will also be exported, which contains additional information for your analysis.
Extract and convert Avro files to JSON
This step takes place on the CAVATICA powered by Seven Bridges.
- Access the project containing the data you imported from GEN3 AnVIL.
- Open the Data Studio tab. This takes you to the Data Studio home page. If you have previous analyses, they will be listed on this page.
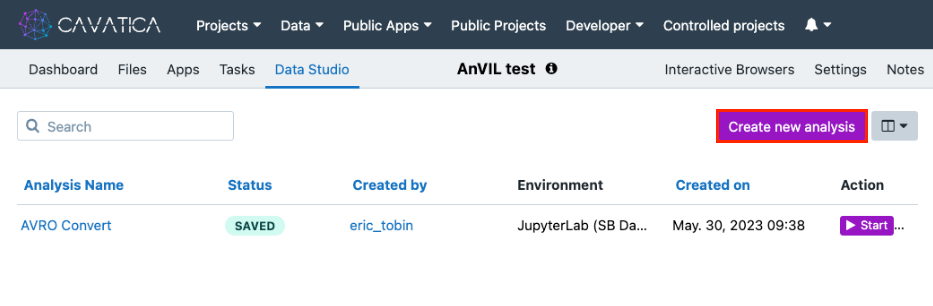
- Click Create new analysis. The "Create new analysis" wizard is displayed.
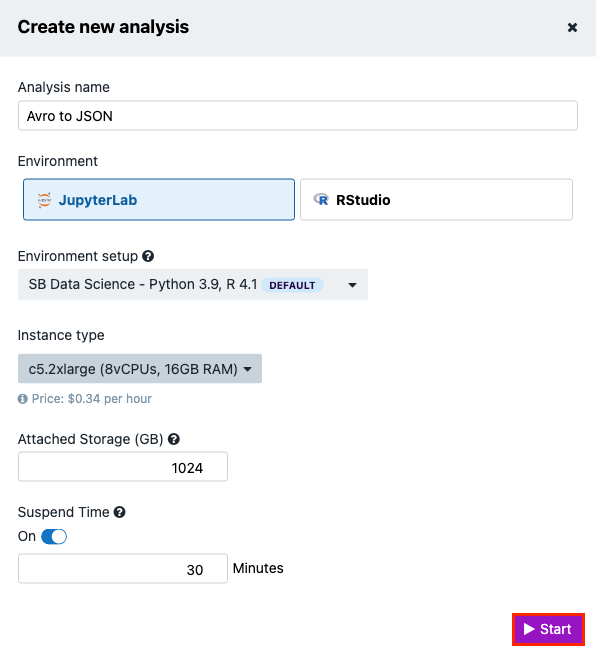
- Name your analysis in the Analysis name field.
- Select "JupyterLab" as the analysis environment.
- Keep the default Environment setup. Each setup is a preinstalled set of libraries that is tailored for a specific purpose. Learn more.
- Keep the default "Instance type" and "Suspend time" settings.
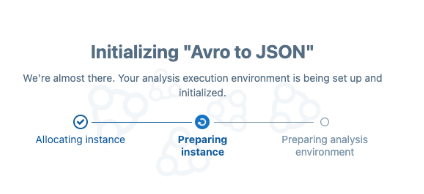
- Click Start. The Platform will start acquiring an adequate instance for your analysis, which may take a few minutes.
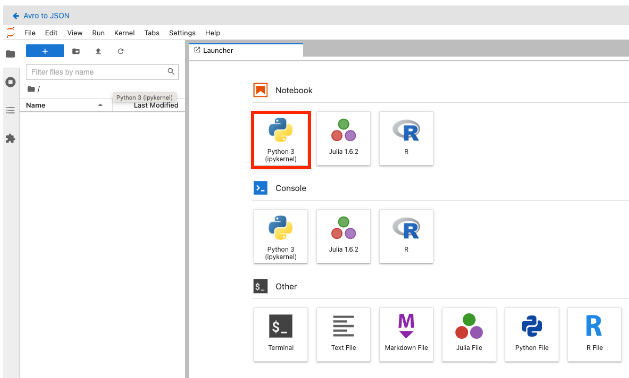
- Once the Platform has acquired an instance for your analysis, the JupyterLab home screen is displayed.
- In the Notebook section, select Python 3. A new blank Jupyter notebook opens.
-
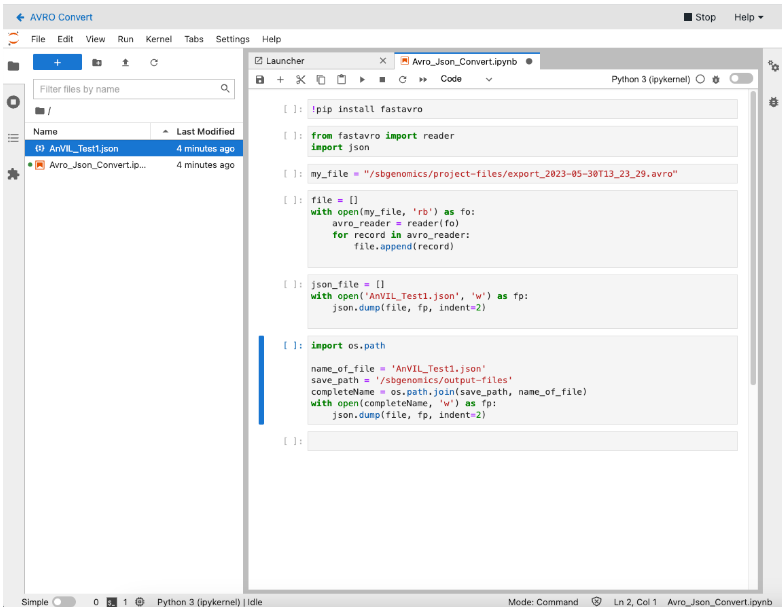
Start by installing the fastavro library:
!pip install fastavro -
Import the reader feature from fastavro and import the json Python library:
from fastavro import reader import json -
(Optional) If your avro file is compressed, unpack the gzip file and save it in the Avro format. Make sure to replace
<gzip-file-name>in the code below with the name you want to use for the unpacked Avro file. The/sbgenomics/project-files/path is the standard path used to reference project files in a Data Studio analysis.!tar -xzvf /sbgenomics/project-files/<gzip-file-name>.avro.gz -
Assign
<avro-file-name>your to an object such asmy_file.my_file = “/sb-genomics/project-files/<avro-file-name>.avro” -
Use the reader functionality of the
fastavrolibrary to read the Avro file and assign its content to thefilevariable. Make sure to replace<avro-file-name>with the name of the Avro file that was extracted from the gzip archive in the previous step.file = [] with open(my_file, 'rb') as fo: avro_reader = reader(fo) for record in avro_reader: file.append(record) -
Save the content to a JSON file. Make sure to replace
<json-file-name>with the actual name you want to use for the JSON file.json_file = [] with open('<json-file-name>.json', 'w') as fp: json.dump(file, fp, indent=2) -
Finally, save the JSON file to the
/sbgenomics/output-files/directory within the analysis; this will save the file to the Files section of the Project on CAVATICA to be used in downstream analysis. When you stop the Data Studio analysis, the JSON file will be saved to the project, and will be available for further use in tasks within that project..import os.path name_of_file ='<json-file-name>.json' save_path = '/sbgenomics/output-files' completeName = os.path.join(save_path, name_of_file) with open(completeName, 'w') as fp: json.dump(file, fp, indent=2)
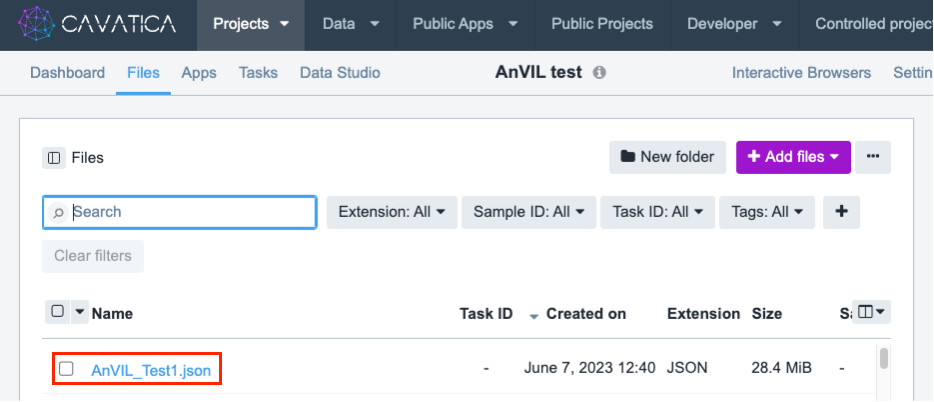
- Inspect the Data Studio instance after stopping to confirm retention of data in a saved .json file in the Outputs section of the Data studio or Files tab.