Prerequisites
All the resources used in the QuickStart, including the files and workflow, are available to you when you sign up for a free account: there is no need to take out a subscription — just use some of your free $100 credits.
Try it out yourself!We encourage you to follow these steps and to try the analysis for yourself. This is the easiest way to become familiar with CAVATICA!
Procedure
We'll start by creating a project and populating it with FASTQ files. Then, we'll use one of the whole exome analysis workflows to carry out the analysis. Finally, we'll examine our results.
On this page:
Create a project
The first step to running an analysis on CAVATICA is to create a project. To do this, click Create a project under the Projects tab in the top navigation bar.
This will open a new window where you can name your project and select a billing group. Let's name our project quickstart and set the billing group. When you're finished, click Create.
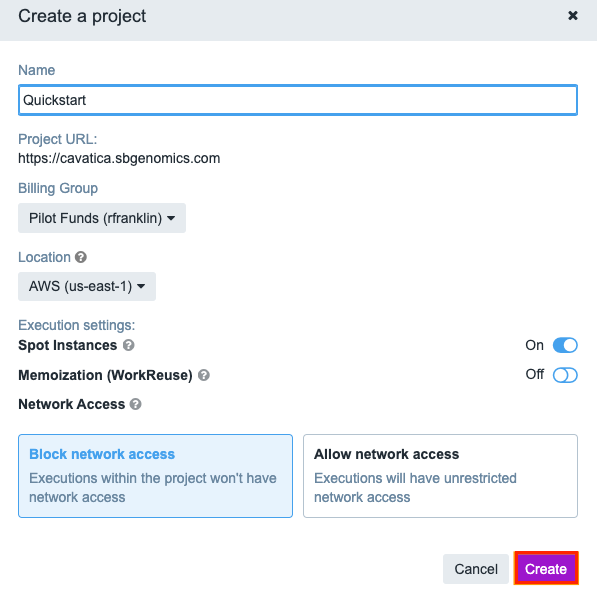
Project URLYour project is given a URL based on its name. While you can rename your project at any point in time, the URL cannot be altered after your project has been created.
Once you create a project, you'll be taken to its Project Dashboard. This page contains all the information about your project, including its files, apps (tools and workflows), tasks (workflow executions), and project members.
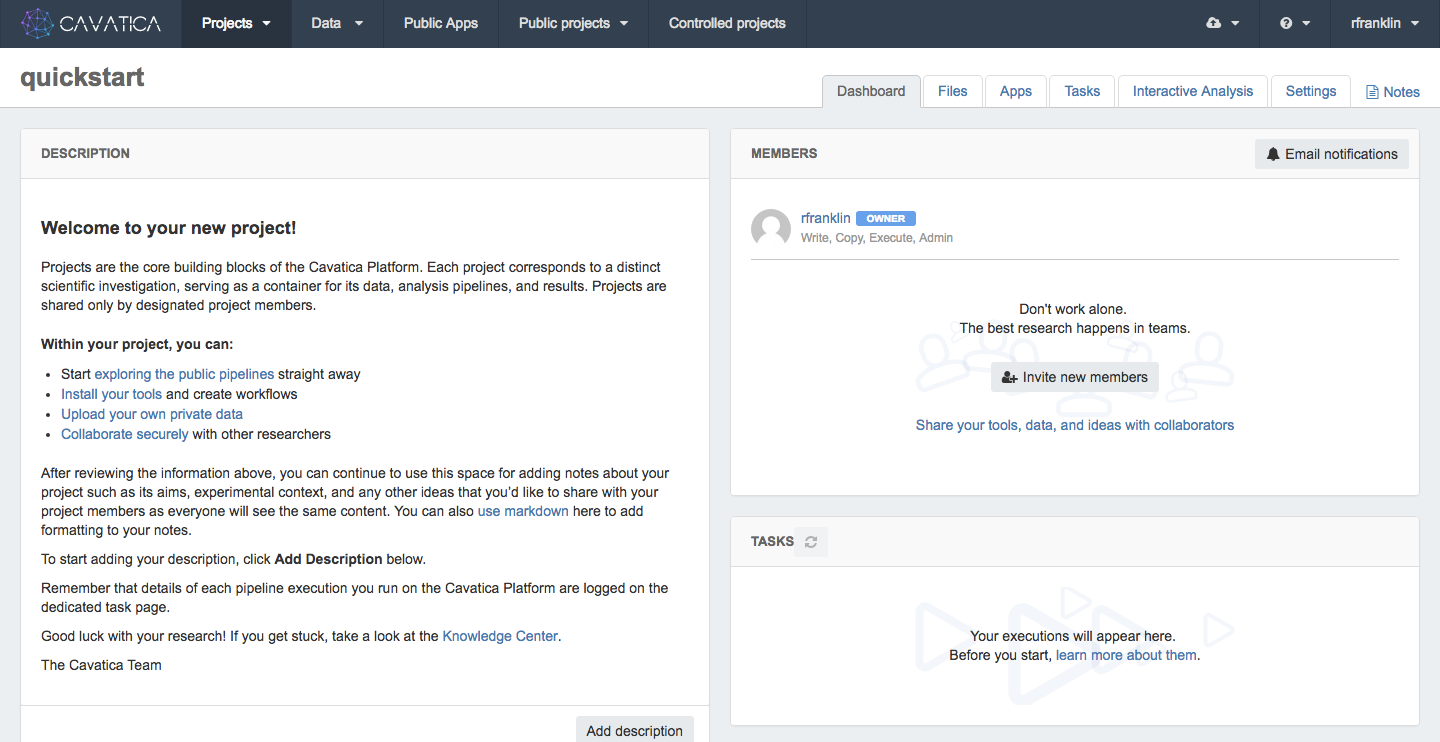
Manage project membersLearn more about adding project members and specifying their level of access in the documentation on managing project members.
Add FASTQ files to your project
The next step is to add the FASTQ files to your project. The other reference files needed for the analysis will be suggested when you set up the workflow.
To find the FASTQ files necessary for the analysis, click the Files tab on your project dashboard and then Add files > Public Files. This opens the file browser.
For this analysis, we want to use two paired-end files that contain whole exome sequencing data. We'll use the search box to quickly locate them.
We want to find a pair of FASTQ files named C835.HCC1143.2.converted.pe_1.fastq and C835.HCC1143.2.converted.pe_2.fastq, we'll enter "C835.HCC1143.2.converted.pe" into the search box to find them.
If you don't know the names of the files you need, you can instead browse all files. Learn more about searching for files on the Platform.
Select both files using the checkboxes adjacent to the filenames, as shown below. To copy the files, click Copy to Project and confirm. To return to the Project Dashboard, just close the File window.

Copy multiple files at once by checking all files before clicking Copy to Project
Enter file metadata
It is important to annotate your files with metadata when you perform an analysis on the Platform so that bioinformatics tools processing files in parallel can group files with identical metadata value(s) in specified fields.
File metadata includes information about the File (e.g. experimental strategy and library ID), Sample (e.g. sample ID), and General (e.g. investigation and species) . For more information on the metadata fields used on the Platform, please see the documentation on file metadata.
Click the Files tab on your project dashboard to see all the files in the project. Currently our project, QuickStart, only contains the two files that we've just added.
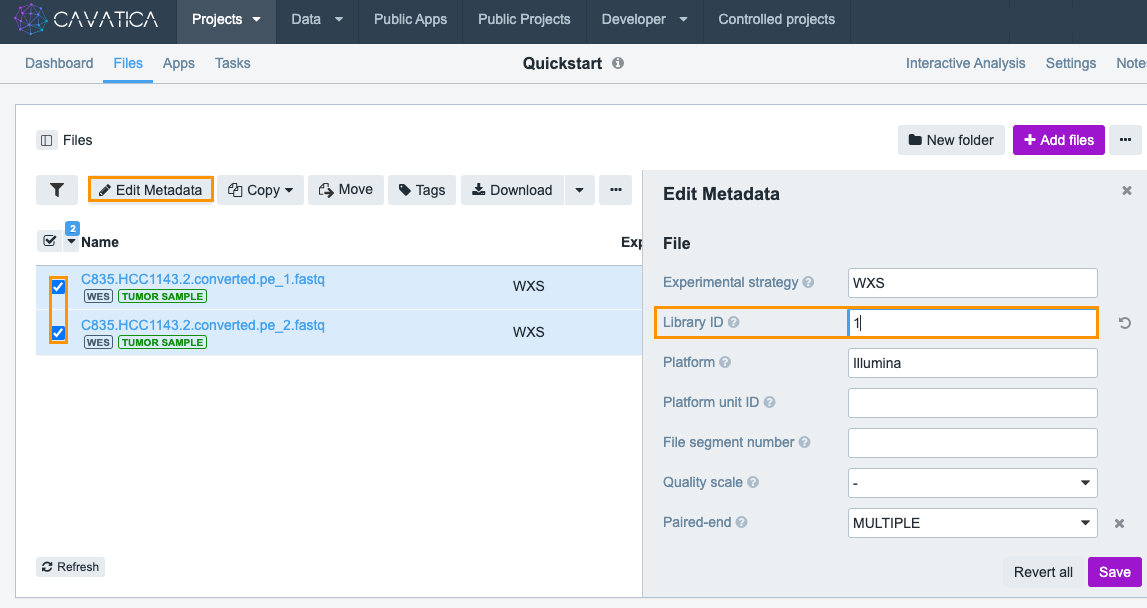
To edit a file's metadata, select the file and click Edit Metadata. You can add (the same) metadata for both files at once. Or, you can do add metadata individually if your files have different metadata. We can edit the metadata for both of the FASTQ files simultaneously.
Select both of the files and click Edit Metadata. This will open a pop-up window with inputs for the different metadata fields. Notice the empty field for Library ID. This needs to be set to run the task. Enter 1 in this field, and click Save.
This metadata will inform tools that these files come from the same sample, were produced by the same library, and have been sequenced on the same lane.
Select a public workflow
The next step is selecting a public workflow for running the analysis. We'll use the workflow,
Whole Exome Sequencing - BWA + GATK 4.0 (with Metrics), which is based on the free version of the GATK toolkit developed by the Broad Institute.
This workflow is one of the many open source workflows available to all CAVATICA users. These workflows have been tested to run efficiently in the cloud environment by the Seven Bridges bioinformatics team.
To select a public workflow for use in your project, navigate to Apps tab on your project dashboard and click +Add App.
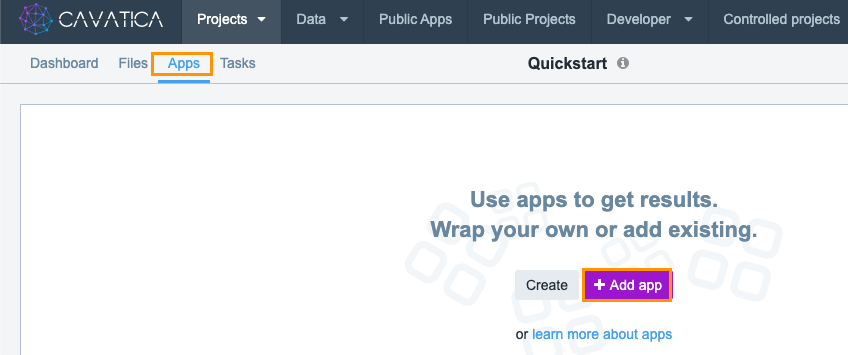
To add the Whole Exome Sequencing workflow:
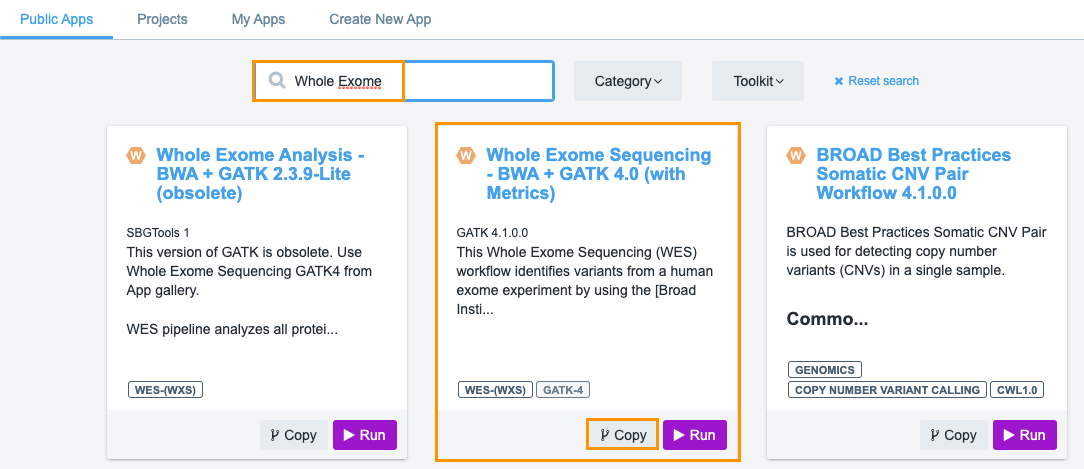
- Type 'whole exome' into the search box. The "Whole Exome Sequencing - BWA + GATK 4.0 (with Metrics)" will be displayed in the search results.
- Next, click Copy below the workflow.
- (Optional) Set the name of the workflow in your project.
- Click Copy and the workflow will be added to your project.
To go back to the project dashboard, close the app browser window.
Edit the selected workflow
In many cases, you might want to tweak a workflow to work better with your dataset. This can be done easily using the workflow editor. To edit your workflow in your project:
- Navigate to the Apps tab.
- Choose option Edit from the ellipsis menu.
- Click Proceed to editing in the popup window.

This opens the workflow editor containing a graphical representation of the workflow where each tool, input, and reference file is represented as a node. To see a description of the workflow's function and other details such as toolkit name and version, tool author, and its license, you can click the App Info tab.
On the workflow editor:
- Click the BWA-MEM Bundle node (see the screenshot below).
- Click the Inputs tab on the right.
- Scroll down, find the use_soft_clipping parameter and move the switch to Yes.
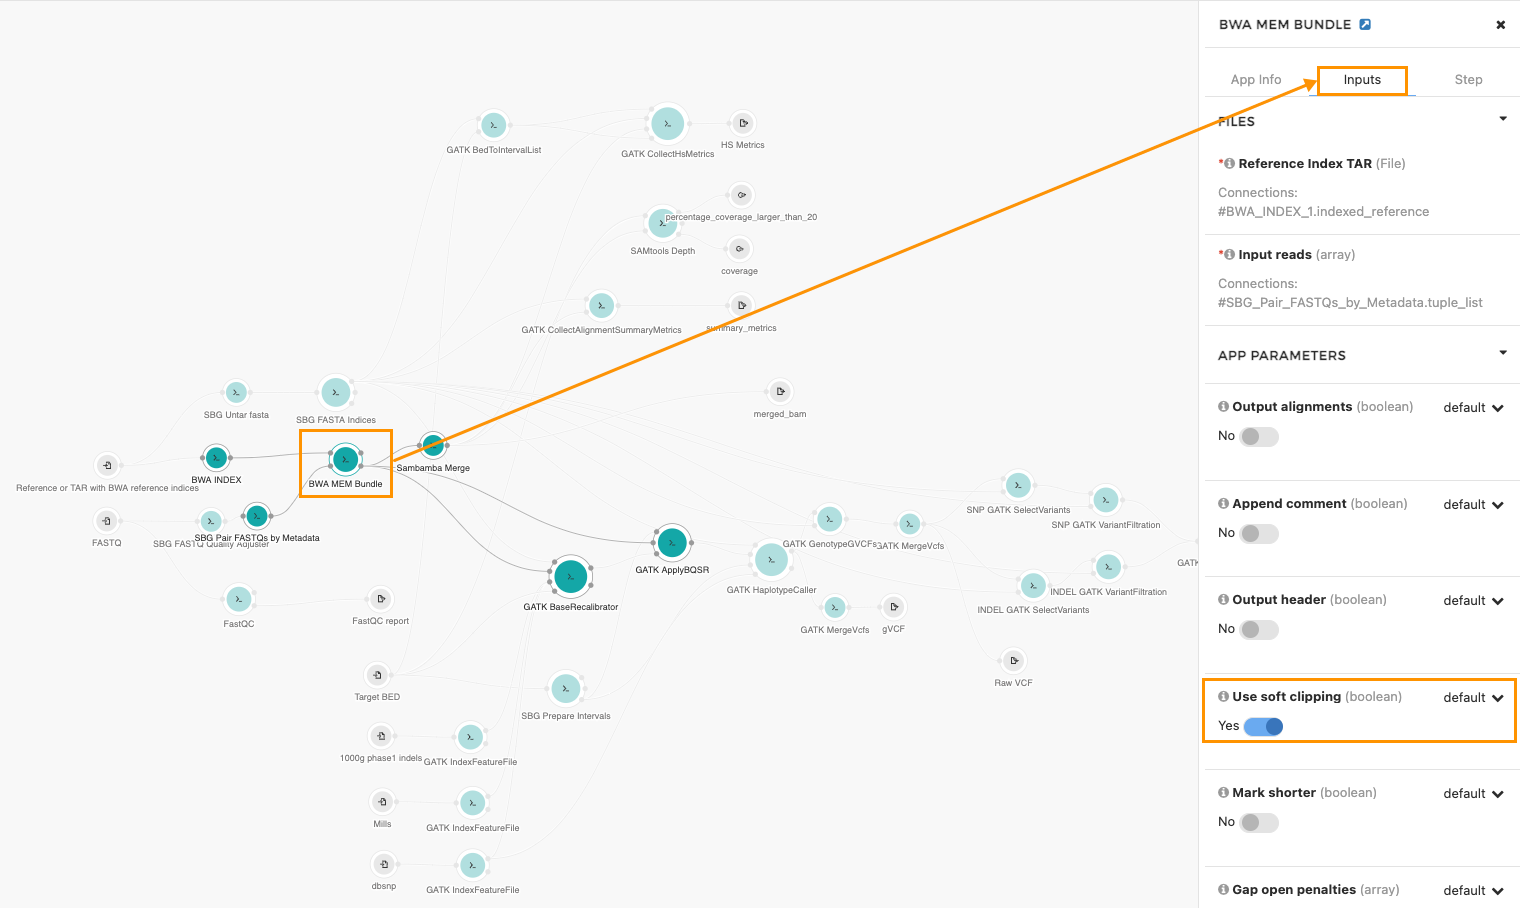
This will soft clip the supplementary alignments. To save this change as a new revision of the workflow, click the save icon in the upper right corner.
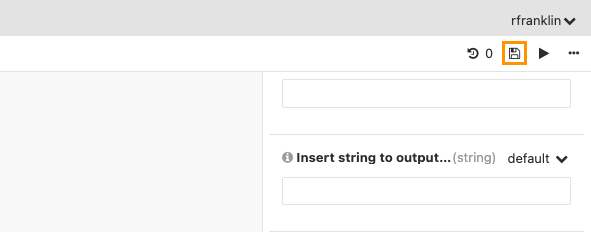
Enter the revision note and click Save again. Note that clicking Save changes the version number from 0 to 1. This function allows you to keep track all your workflow edits.
Run the analysis
Now that the workflow is ready, it's time to run the analysis. We'll click Run, in the upper right corner. The pop-up window with the suggested files for this workflow will be displayed.
For all public workflows on CAVATICA, our team of bioinformaticians has chosen a set of recommended input files.
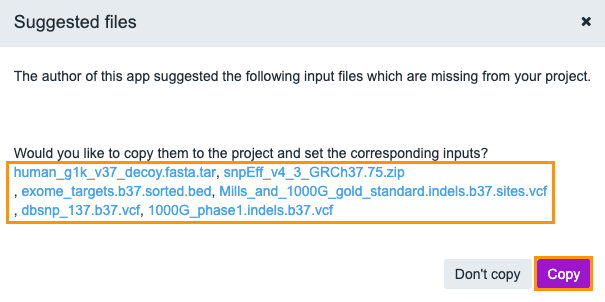
Click Copy and the suggested files will be copied to your project and added as input files to our workflow. The files are mapped the following way.
Input port | Input files | File type |
|---|---|---|
Known_SNPs Known_Indels | dbsnp_137.b37.vcf Mills_and_1000G_gold_standard.indels.b37.sites.vcf |
|
Target_BED | exome_targets.b37.sorted.bed |
|
SnpEff_Database | snpEff_v4_3_GRCh37.75.zip |
|
FASTQ | C835.HCC1143.2.converted.pe_1.fastq |
|
Reference or TAR with BWA reference indices | human_g1k_v37_decoy.fasta |
|
On the DRAFT Task page you will see the following sections under the Task Inputs tab: Inputs and App Settings, as shown in the screenshot below.
We'll ignore these for now (for details, see the documentation on tool settings. The section marked Inputs is where you can enter the input files and reference files for your workflow.
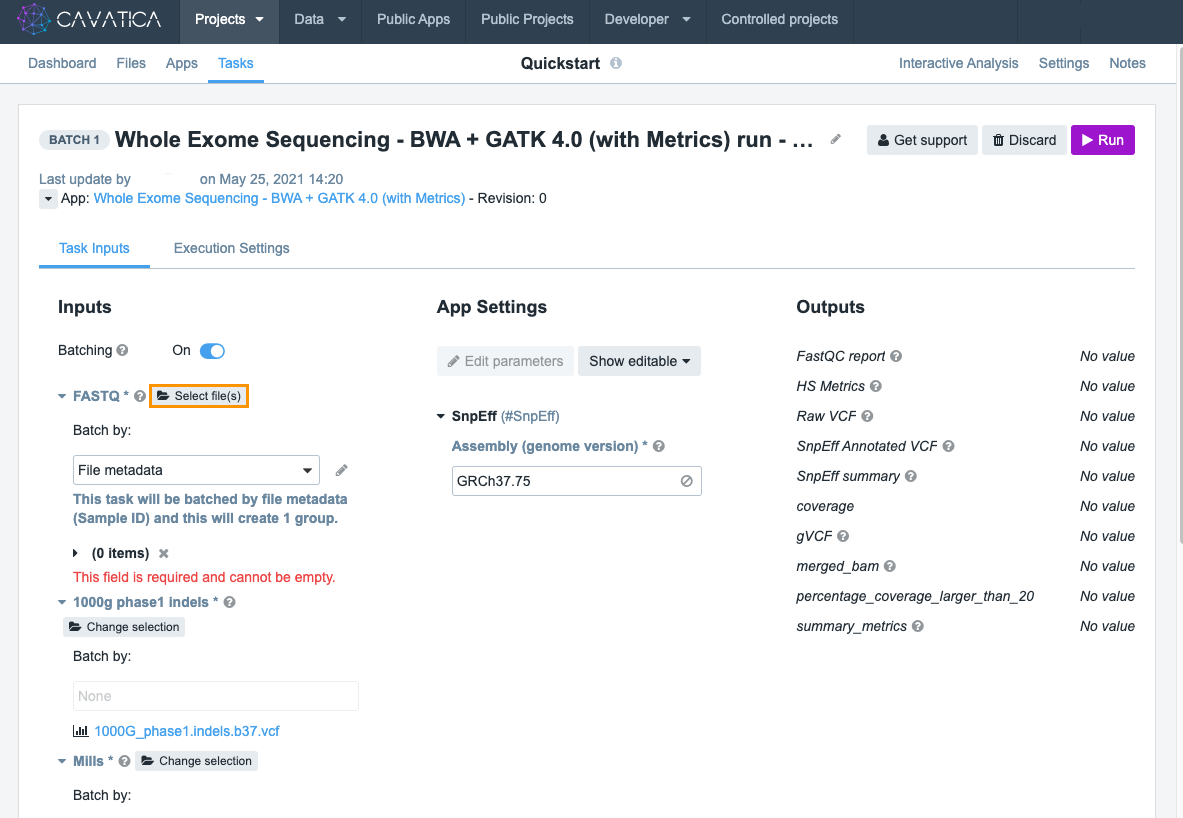
The only remaining files you need to select are FASTQ files. Click Select file(s) and choose these files:
- C835.HCC1143.2.converted.pe_1.fastq
- C835.HCC1143.2.converted.pe_2.fastq
The files will be batched by sample, meaning that files with the same Sample ID metadata field will be processed together in a separate task. In our case, the paired-end files we picked already had the Sample ID field set to the same value.
After adding the two FASTQ files, we can start this execution by clicking Run.
When you start the task, a new page opens displaying the task's properties. To see all the tasks that have run or are running in this project, click Back to tasks in the upper left corner.
Here you can see the name of each task, the project member who started it, its initiation time, the execution workflow, its status, and available task actions.
The status will be a progress bar if the task is still running or a label notifying whether the task has completed, been aborted or failed. Additional information, including how to check the status of the task or how to troubleshoot in case of the failed task, is available in the documentation on task statistics.
View the results of the data analysis
Once the task is completed, you'll be notified via email. The easiest way to access results is to go to the Tasks tab and click the name of the task. This will show all the information related to this particular execution.
On the task' page, the column marked Outputs shows the results produced by the tools in the executed workflow. In our example task, take a look at summary_metrics report. Clicking on the file name opens the alignment metrics from the task.
At the bottom of the screen you can see the task's raw output.
The result of the data analysis is shown in the raw VCF file. The raw VCF contains all the variants detected by the workflow. To download it, just click on its filename.
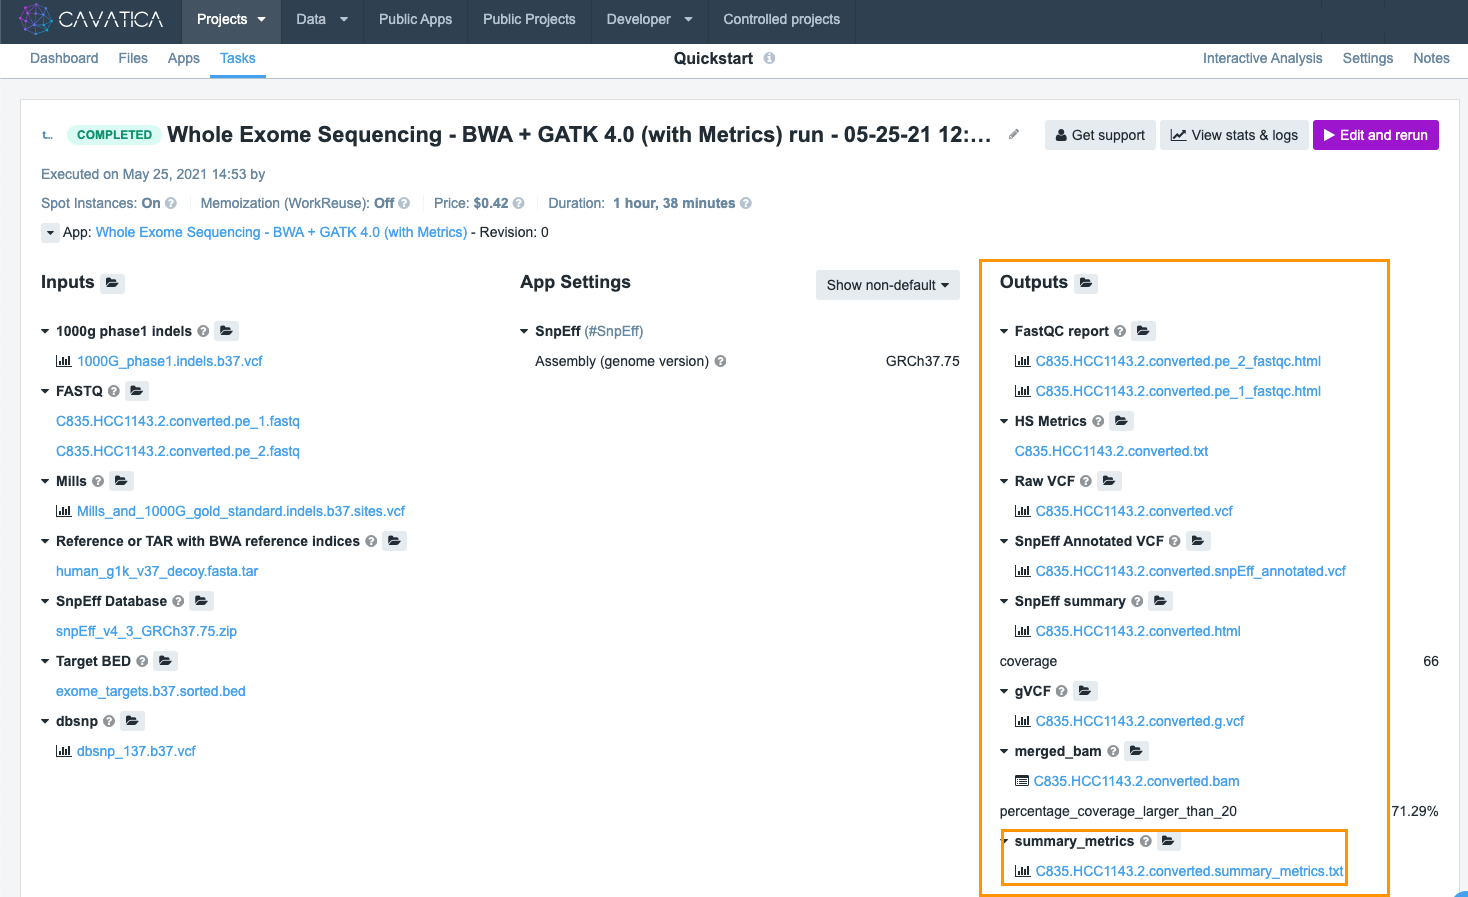
This will open a new page displaying the contents of the file and some information describing it. Then click Download in the upper right corner.
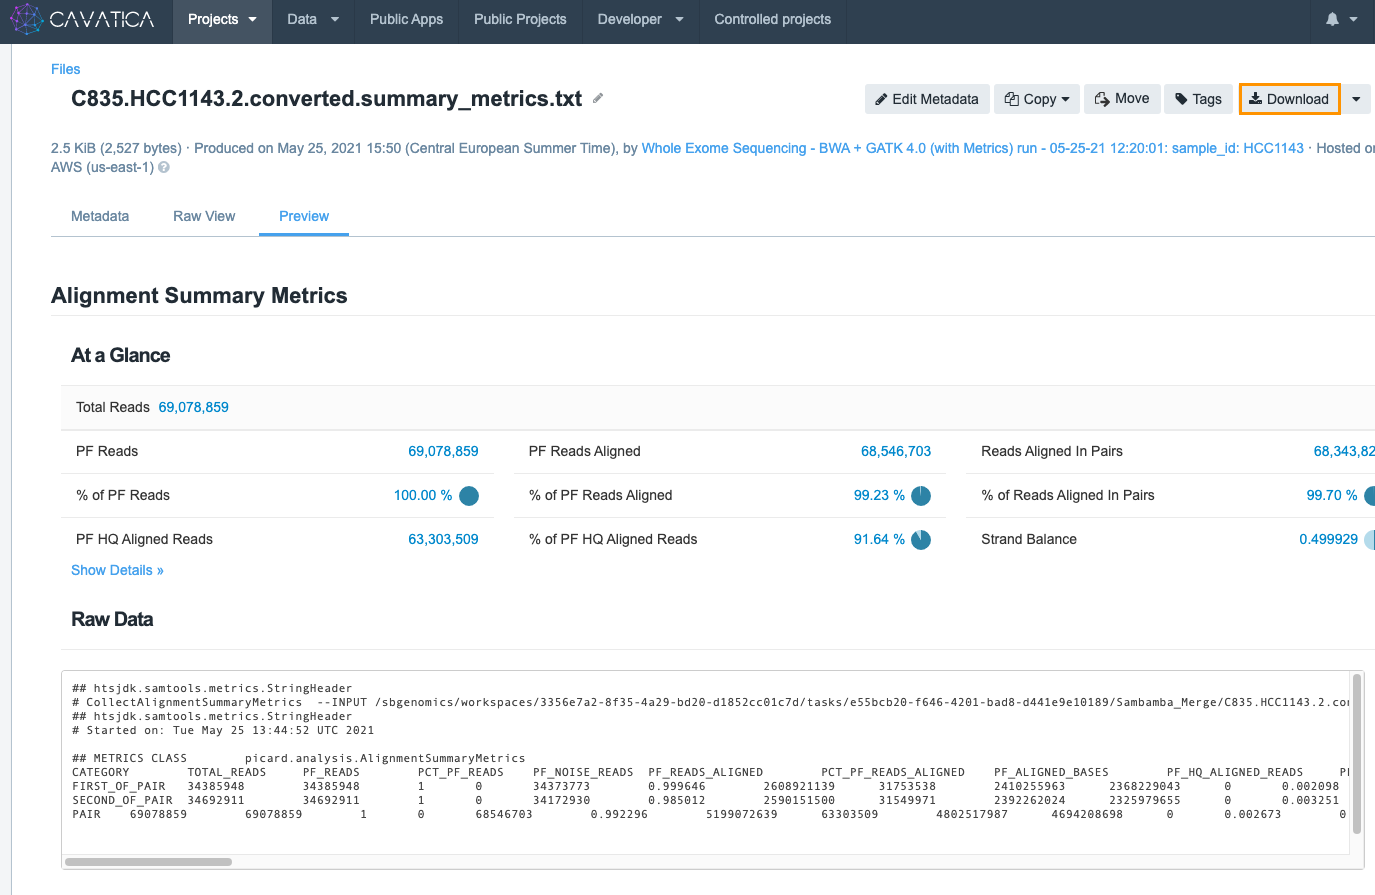
Note that the names of files outputted from a tool incorporate part of the tool's name. This makes it easier to find report files from a list of outputs.
That’s it! We've executed a data analysis and obtained some results. We encourage you to try this procedure for yourself before getting started on your own data analyses.
You can also visit the Seven Bridges Knowledge Center to learn more about the Platform capabilities and bringing your own tools, as well as the rest of the CAVATICA Knowledge Center to find out about Cavatica-specific features.
Updated 3 months ago
