Tag your files
Overview
You can tag your files with keywords or strings on CAVATICA to make it easier to identify and organize files you’ve imported from public datasets. The tags will help you visually keep track of files as you import them into your project from the Public Reference Files repository or upload them to CAVATICA.
You can also tag files you copy between projects. These tags allow you to sort and filter files within a project and on the DRAFT task page.
Tag files during uploadLearn more about tagging files as you upload them via the command line, or from an FTP or HTTP(S) server.
Add tags when copying files
When you copy files from the Public Reference Files repository, you will be prompted to tag your files as you import them into a project.
To tag your files, first copy them from Public Reference Files to your project:
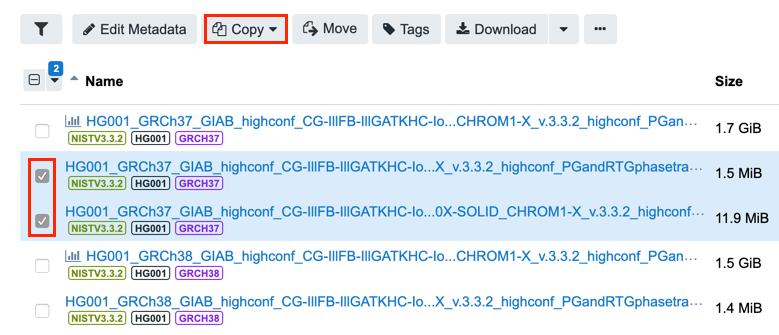
- Select Data from the top navigation bar and click Public Reference Files in the drop-down menu.
- In the file picker which appears, click the checkbox next to your desired files to select them, as shown below.
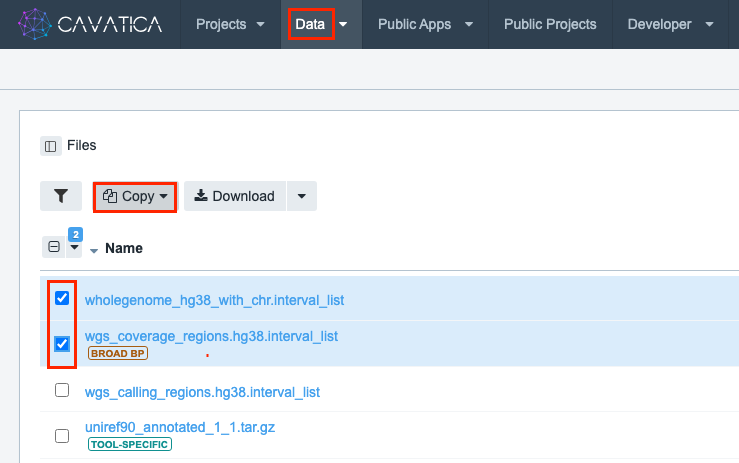
- Click Copy, and select your desired project from the drop-down menu.

- In the pop-up which appears, check you're copying the correct number of files into your desired project.
- If there is a folder structure within the project, select the exact destination (root folder or a subfolder)
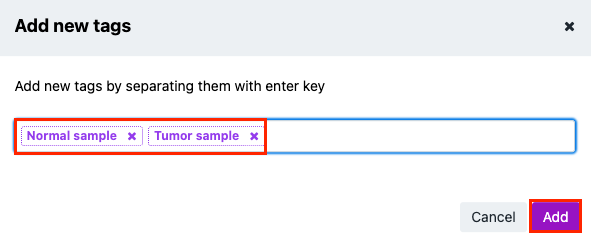
- Enter one or more tags, separated by commas, into the box. Any previously used tags in your selected project will be autosuggested.
- Click Copy to copy the files into your project.
The files will display in the Files tab of your project. Learn more about file tags within a project below.
Manage file tags within a project
To manage file tags within your project, first navigate to your project. From the Files tab of your project, you can:
- Add tags for your files
- Remove tags from your files
Add tags for your files
To add tags to files within a project:
-
Select the files.
-
Click Edit tags and select "Add tags".

-
In the pop-up box, enter one or more tags separated by comma, tab or enter. Any previously used tags in your selected project will be autosuggested.
- Click Add to finish tagging.
Remove tags from your files
To remove tags from files in your project:
- Select the files.
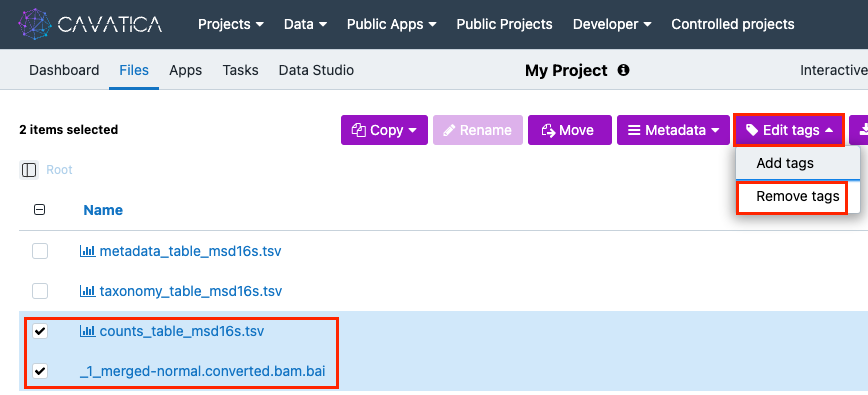
- Click Edit tags and choose option "Remove tags".
- Choose to either remove specific tags or use "Remove all tags" to remove them all.
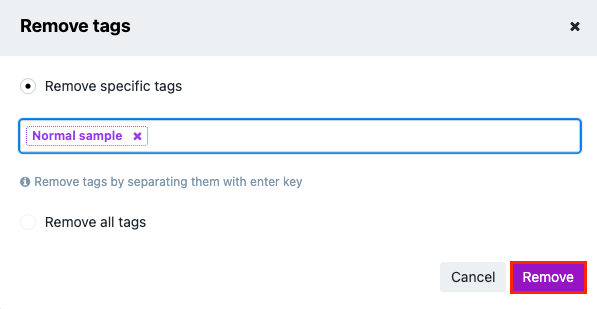
- Click Remove to finish removing tags.
Copying files between projects
When you copy files between projects, you will be prompted to tag your files as you import them into a project.
To copy files between projects:
- Navigate to your desired project by selecting Projects from the top navigation bar and clicking View all from the drop-down menu.
- Select the project which contains the files you wish to copy.
- From the project dashboard, click the Files tab. This will display a list of all the files in your project.
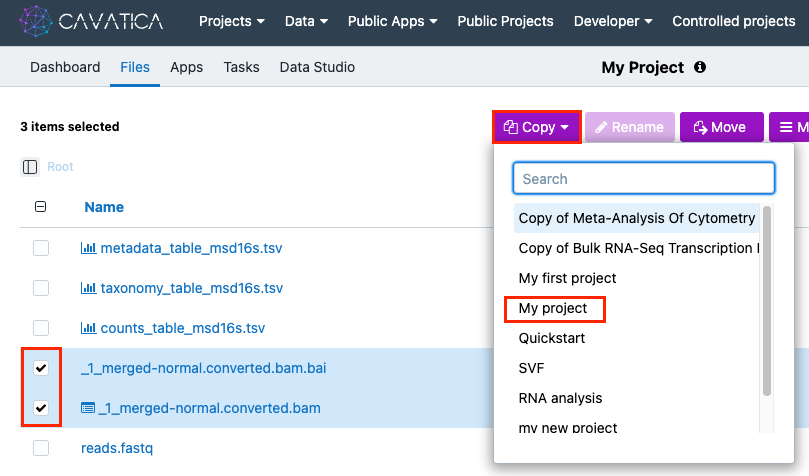
- Click the checkbox next to your desired files to select them, as shown below.
- Click Copy and select your desired project from the drop-down menu.
- In the pop-up box, check you're copying the correct number of files into your desired project.
- Enter one or more tags, separated by commas, into the Add tags field. You'll see existing tags for the files, and any previously used tags in your selected project will be autosuggested.
- Click Copy to finish importing files into your project.
The files are displayed in the Files tab of your selected project.