Modify project settings
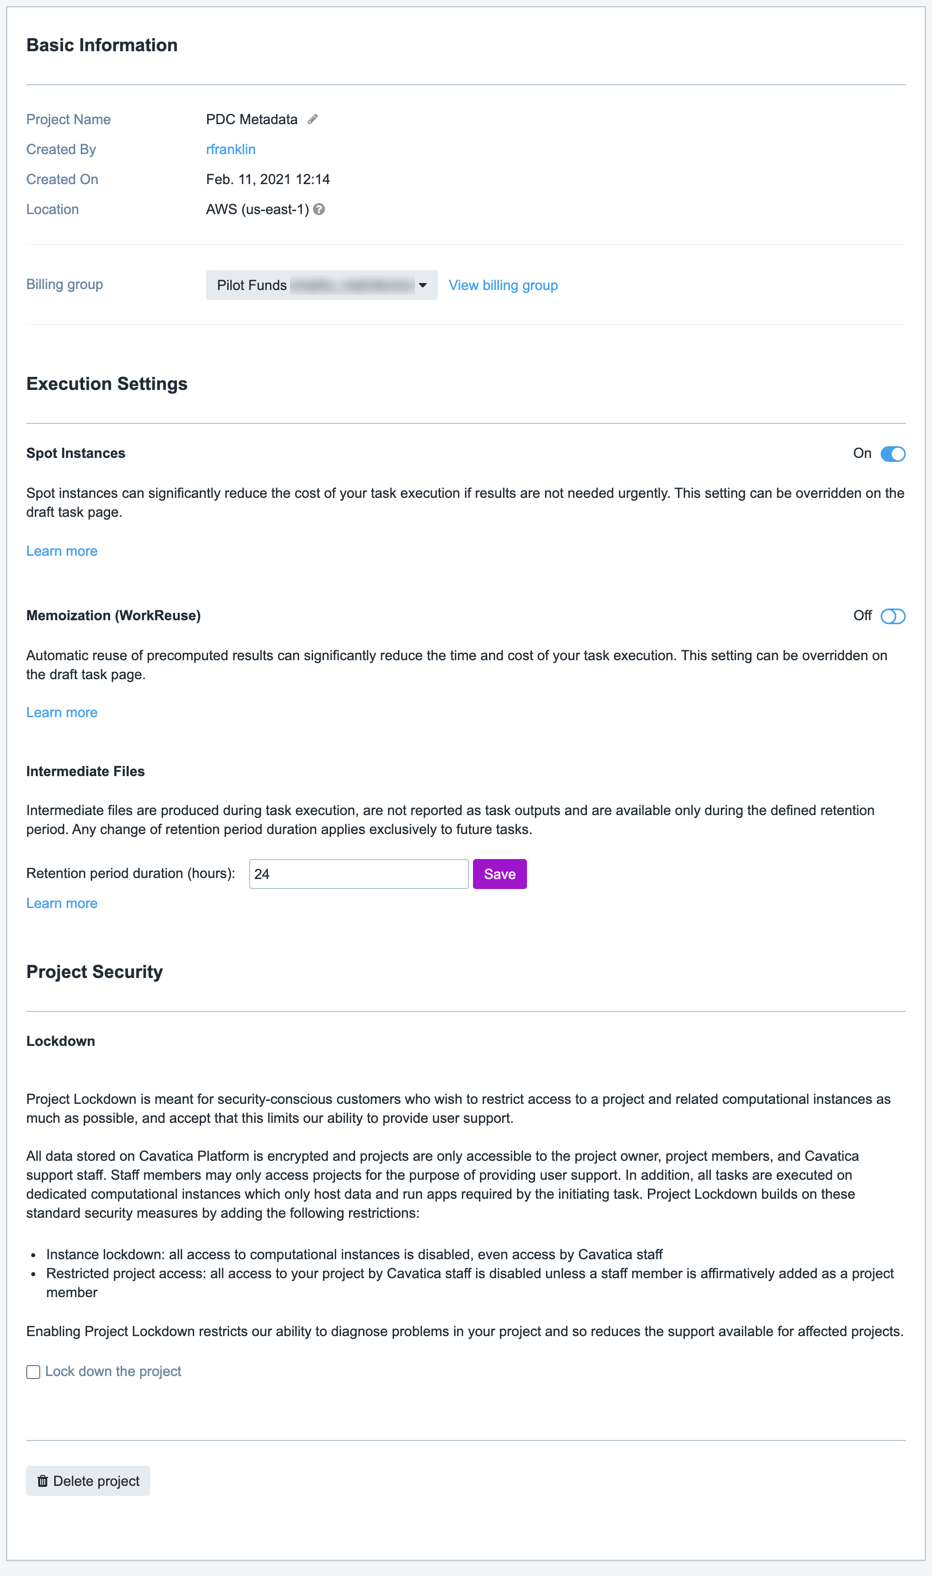
Project administrators can change basic project information, set default task instances, and increase project security.
To access project settings, select the project you wish to change, and go to the Settings tab.
Review and change the basic information about a project
You can access a project's basic information, such as the project name, its creator, and the date of creation from Settings tab. To update the project name and description, click the pencil icon. To keep the change, click the check mark.
Change a project's nameYour project will be assigned a short name based on the name that you give it. While you may re-name your project from the project Settings, you cannot change short name after your project is created. The short name is used as an ID to refer to the project when using the API, and also appears in the URL for the project, which is used to access it in your web browser.

Change a project's billing group
To change or create a billing group, click the drop-down Billing group menu.
Modify execution settings
Spot/Preemptible instances
If your project is located in in AWS-based location, you can activate or deactivate spot instances for your project by using the switch under Spot instances. If you are using a Google-based location, you will be able to enable or disable Preemptible Instances. Learn more about spot/preemptible instances.

Memoization
Enable or disable automatic reuse of precomputed results to help reduce the time and cost of your task execution. Learn more.
Intermediate files
Define for how long intermediate files are kept on Cavatica.
MANAGE NETWORK ACCESS CONTROL
Network access control allows you to define a more restrictive network access policy per project, thus ensuring high security and compliance standards in the execution environment. As a project administrator, you have the option to define network access permissions for project executions on project creation or after (via the visual interface, or via the API).
When used in combination with enabled download restriction, blocked network access also restricts downloads from the Data Studio space, thus ensuring the highest possible level of unauthorized download or previewing of controlled data.
There are two available settings:
- Block network access: Selected option for all new projects by default. Your execution environment will be isolated from the network, adding an additional layer of protection for your work and data. Any connection to an external network host for file upload or download, contacting a licensing server, installing additional libraries, and similar will be denied. However, you will be able to access the Cavatica API and access to Cavatica entities and internal services won’t be affected.
- Allow network access: All network traffic is allowed without restrictions.
All Projects that had been created before this functionality was made available on Cavatica will continue to allow network access as they did before. However, project administrators have the option to subsequently change this setting and restrict network access for any existing project.
CONTROL NETWORK ACCESS THROUGH THE VISUAL INTERFACE
Project administrators can allow network access by exception for a chosen project either on project creation or via the Project Settings tab for projects that have already been created.
CONTROL NETWORK ACCESS THROUGH THE API
The allow_network_access parameter provides equivalent control over the Network Access setting as a part of the following API calls:
Increase the security of a project
Your project resources are only available to you and the other Cavatica users you invited as project members.
All projects on Cavatica are encrypted on disc and in transfer. The environment for task execution is only used to host data and run apps required by the initiating task.
You can allow Seven Bridges team members to access your task if you need support. To do this, make sure that the project that the task is in is not locked down. Locking down a project prevents any Seven Bridges team member from viewing any information about the task.
To lock down your project, click on Projects on the main dashboard, select the project whose security you wish to modify, and go to the Settings tab. Then, select Lock down the project under Project Security.
Project supportLocking down a project significantly limits the amount of support the Seven Bridges team can provide for tasks within the locked project.
Updated 3 months ago
