Export task output files to a volume
CAVATICA allows you to export the output files from an EC2 instance on which the task is executed to your Amazon Web Services (AWS) volume. The files are uploaded to the volume you specify while CAVATICA saves and displays the file aliases which point to the actual files on the volume.
This functionality can also be used via API.
Prerequisites
Before you can export task output files to your volume, please make sure the following criteria are met:
- The volume is connected to CAVATICA.
- The volume is set to allow direct export (see below).
- You have the write permission for the volume.
Procedure
Follow these steps:
- Navigate to your project.
- Click the Tasks tab to access the tasks.
- Create a draft task or rerun an existing task.
- Under the Task Inputs tab, look for the Outputs section on the right.
- Click the folder icon next to the Main destination path field.
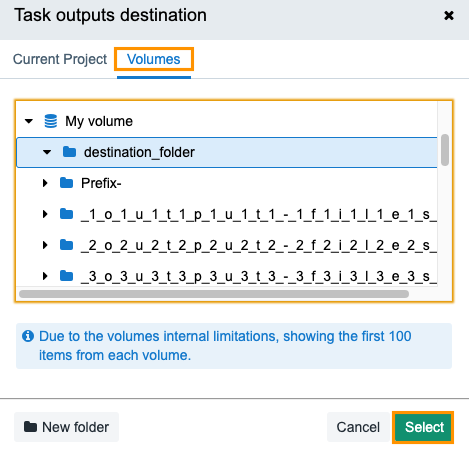
- Click Volumes.
- Select a volume and navigate to an existing destination folder.
- (Optional) Alternatively, click New folder to create a new destination folder. The allowed characters for a folder name are 0-9, a-z, A-Z, hyphen (-), underscore (_), period (.), tilde (~), equals (=), colon (:). The name must be at least one character long.

- Click Select.
The location should be defined prior to executing the task. In addition, please keep in mind there might be an egress cost (data transfer out- from your task to a volume that is in a different region) because you may be moving files from the Seven Bridges instance and to a volume that is in a different region.
Setting the destination for individual files
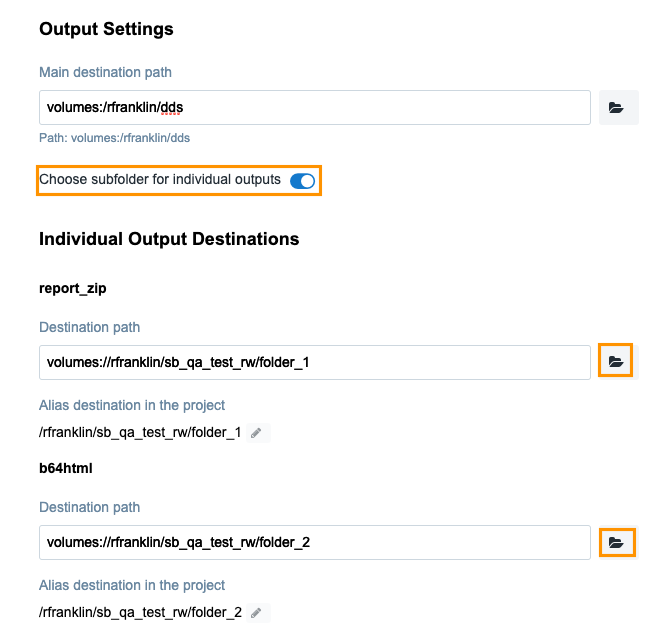
CAVATICA allows you to set different destination path for each of the task output files. This will place individual output files into designated subfolders.
Procedure
- Access the task you wish to set up.
- Enable this feature by moving the Choose subfolder for individual outputs toggle to the right.
- Use the folder icon on the right to specify the folder for each of the files.
- (Optional) Alternatively, click New folder to create a new destination folder.

Set up your volume
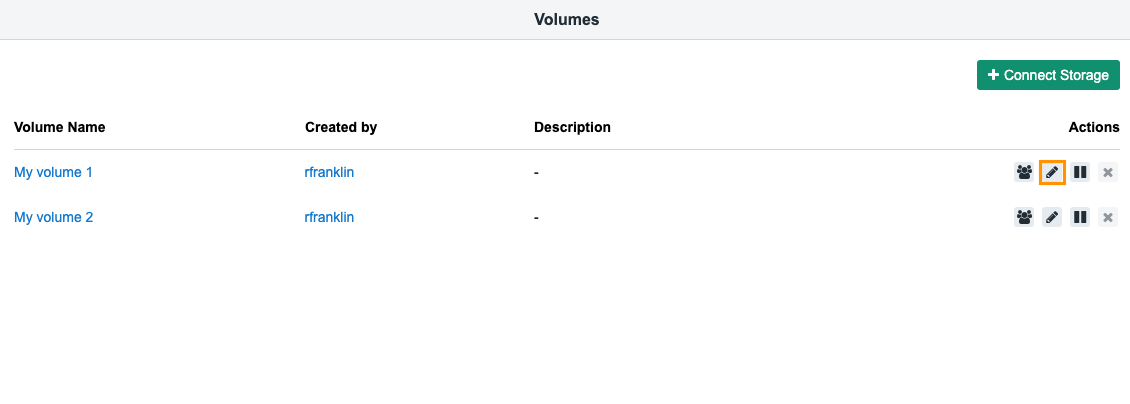
Before you can export the task output files to your AWS volume, you need to enable this option either when you first connect your volume or by editing an already attached one. This page will only highlight the part of the procedure that enables this option. Learn more about the full procedure for connecting your volume.
Procedure when connecting a new volume
- Choose Volumes from the Data drop-down menu.
- Click Connect Storage to connect a new volume.

- Within the Bucket tab check the Direct Export option.
Updated about 2 months ago
