TCGA data access
On this page:
Overview
The Cancer Genome Atlas (TCGA) is made available on CAVATICA through an integration with the Seven Bridges Cancer Genomics Cloud (CGC). TCGA on CAVATICA includes both Open and Controlled Data. While all data in TCGA is stripped of direct identifiers, DNA information is inherently unique to an individual. Two types of data access ‘tiers’ have been put in place to balance the desire to make the data as widely available as possible while ensuring that the rights of study participants are well protected. These two access tiers are described below.
Open Data includes information which is not unique to an individual. This includes information such as:
- De-identified clinical and demographic data
- Gene expression data
- Copy number alterations in regions of the genome
- Epigenetic data
- Summaries of data across individuals
Controlled Data includes information which is unique to an individual. This includes most raw data files and some processed data such as:
- Primary sequencing data (BAM and FASTQ files) from DNA, RNA, miRNA or bisulfite sequencing studies
- Raw and processed SNP6 array data
- Raw and processed Exon array data
- Somatic and germ-line mutation calls for an individual (VCF and MAF files)
Learn about your user responsibilities and how to authenticate and access TCGA data on CAVATICA.
Seven Bridges is an NIH Trusted Partner, and we've made data security a priority. In addition, users are required to abide by their dbGaP data access requests and theNIH Genomic Data User Code of Conduct, the elements of which are reproduced below:
- Investigator(s) will use requested datasets solely in connection with the research project described in the approved Data Access Request for each dataset;
- Investigator(s) will make no attempt to identify or contact individual participants from whom these data were collected without appropriate approvals from the relevant IRBs;
- Investigator(s) will not distribute these data to any entity or individual beyond those specified in the approved Data Access Request;
- Investigator(s) will adhere to computer security practices that ensure that only authorized individuals can gain access to data files;
- Investigator(s) will not submit for publication or any other form of public dissemination analyses or other reports on work using or referencing NIH datasets prior to the embargo release date listed for the dataset (or dataset version) on dbGaP;
- Investigator(s) acknowledge the Intellectual Property Policies as specified in the Data Use Certification; and,
- Investigator(s) will report any inadvertent data release in accordance with the terms in the Data Use Certification, breach of data security, or other data management incidents contrary to the terms of data access.
Learn more about updating your Data Access Request to list Seven Bridges as the Platform as a Service (PaaS) and include cloud use. For TCGA-specific documents, please refer to the TCGA publication guidelines for point 5 above and the TCGA Data Use Certifications for points 6 and 7 above.
##Authenticate and access TCGA
As TCGA on the CAVATICA is available through an integration with the Seven Bridges Cancer Genomics Cloud (CGC), the CGC is the source for authenticating you with dbGaP and authorizing access to TCGA data. To access TCGA on CAVATICA, you will first be directed to create an account on the Seven Bridges CGC. After registering for a CGC account, you can connect your CGC account to your CAVATICA account to associate your CGC credentials.
###Step 1: Register for a CGC account
You can sign up for the CGC using your (1) eRA Commons or NIH cit credentials or (2) your email address.
Note that to access TCGA Controlled Data on the CGC, you need to register with eRA Commons or NIH cit credentials which have the appropriate data access permissions through dbGaP. If you don't log in with eRA Commons or NIH cit credentials, you will only be able to access TCGA Open Data.
Please read the following instructions carefully before registering for the CGC.
- Option 1: If you have an eRA Commons or NIH cit account, register using these credentials.
- Option 2: If you don't have an eRA Commons account, register for a CGC account with your email address.
Option 1: register using eRA Commons or NIH cit credentials
To register for the CGC using your eRA Commons or NIH cit credentials:
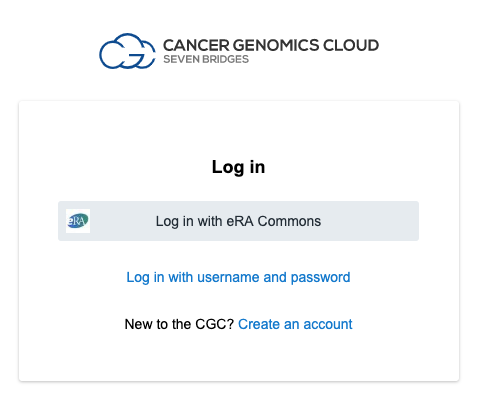
- Navigate to the login page at https://cgc-accounts.sbgenomics.com/auth/login.
- Click Log in with eRA Commons to access the external NIH iTrust site for authentication.

- To complete authentication, enter your eRA Commons or NIH cit username and password.
- To complete your registration, enter the additional information required by the CGC and click PROCEED TO THE CGC PLATFORM.
We encourage you to read the CGC Terms of Use and TCGA Data Use policy carefully before using the CGC.
Option 2: register for the CGC if you do not have eRA Commons credentials
If you do not have eRA Commons credentials, create a CGC account using your email and a password. Note that accounts created using this method will not have access to TCGA Controlled Data. Register using your eRA Commons or NIH cit credentials if you have approval to use TCGA Controlled Data.
To register with your email:
- Navigate to the login page at https://cgc-accounts.sbgenomics.com/auth/login.
- Click Create an account.
- Click Continue with email and password and provide the information requested.
- Click Register.
- Check your email to confirm your registration.
###Step 2: Connect your CGC account with your CAVATICA account
Once you've created a CGC account, you can connect your CGC account to your CAVATICA account. Your CGC credentials will be associated with your CAVATICA account, and you will be able to access TCGA data right away.
To connect your CGC account, first you must obtain your CGC authentication token:
- On the CGC, click Developer in the top navigation and choose Authentication token.
- Click Generate Token to create your authentication token.
- Copy your authentication token to the clipboard. We'll be using this in a later step.
Now that you have your CGC authentication token, you can connect your account as follows:
- On CAVATICA, click your username in the upper right corner and choose Account Settings from the menu.
- Select the Dataset Access tab from the menu on the left.
- Paste your CGC authentication token under CANCER GENOMICS CLOUD and click Connect account.
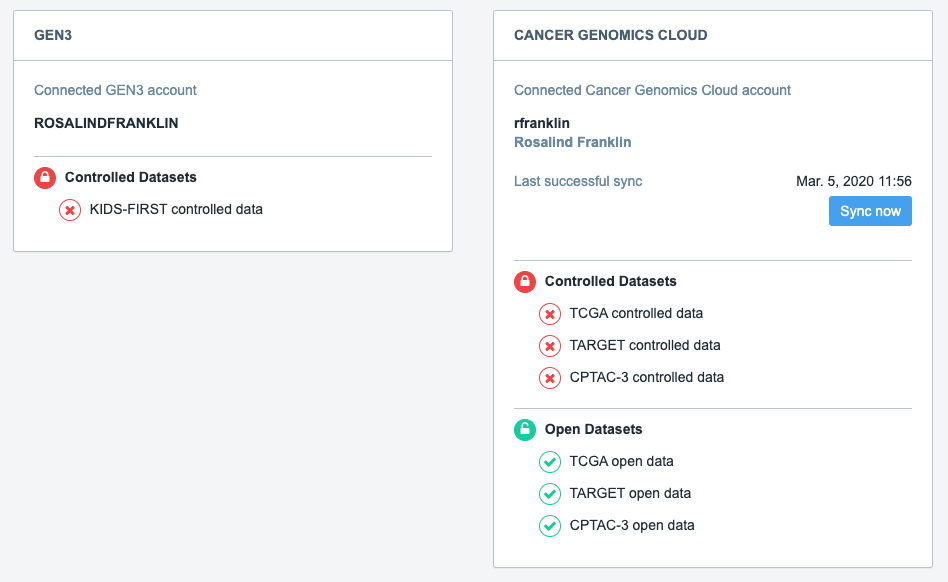
Your CGC account, along with your TCGA data access credentials, is now linked to your Platform account, as shown below. On this screen, you can also see the datasets available to you.

Note that your CGC authentication token will expire every few months. At this point, you need to reconnect your CGC account to your CAVATICA account by following steps 1 through 3 above.
##What type of TCGA data will I be able to access?
Once you register for a CGC account, you'll have access to TCGA data based on your data access approval. TCGA data on CAVATICA consists of Open Data and Closed Data.
All CAVATICA users can access Open Data as soon as they create and connect their CGC account and agree to the TCGA Data Use Certifications as well as the TCGA publication guidelines.
Researchers requiring access to Controlled Data for their studies are required to obtain an approved Data Access Request through dbGaP and to agree to the TCGA Data Use Certifications](http://cancergenome.nih.gov/pdfs/Data_Use_Certv082014) as well as the TCGA publication guidelines.
If you are either a PI or a downloader in an approved dbGaP application, be sure to list Seven Bridges as the Platform as a Service (PaaS) in your dbGaP application.
Learn more from our documentation on the CGC Knowledge Center about TCGA Data and obtaining permissions to access TCGA data.
To start querying TCGA data right away, try using the The Data Browser . This interactive graphical interface allows you to build queries to filter data using various metadata attributes. You can then access these files for further analysis.
To access the Data Browser, click on Data on the top navigation bar and select Data Browser.
Updated 7 days ago
